First, create a Campaign (or a Group) for your landing pages by giving it a name. You can name your Campaign anything, however, we recommend using the same name as your Google Ads Campaign to avoid confusion. You can create multiple campaigns by clicking on the "Add Campaign" button on the "My Campaigns" page.
Add the URLs of the landing pages you wish to track to your Campaign. You can monitor a single landing page or add several pages to the campaign.
clickreport.com will generate a unique tracking code script for each of the landing pages added. To get the tracking code for a page, log into your account and go to the "My Campaigns" page. Click on the URL of the page whose tracking code you want to access, and a menu will drop down. On the right, click on the 'Get Tracking Code Script' option. Your tracking code will be displayed on the next page. Each landing page listed in your account has its own unique tracking code.
Copy the tracking script and go to the landing page's source code. Past the tracking code just before the closing body tag of the landing page's source code. This will prevent the script from interfering with, or being affected by, other things that may be incorporated into your page.
Amend your pay per click advertisement to include the tag you've just added at the end of the destination URL.
To do this:
Note: google1 can be substituted by any text up to 12 characters long 0-9, A-Z, -, and _. No other special characters or spaces should be used.
Example: If your pay per click provider is Google and your destination URL is www.MySite.com, simply add ?crtag=Google to the destination URL. The final destination URL now supplied to Google will look like this: www.MySite.Com?crtag=Google
For more help with setting up your account, take a look at our FAQs page or email support at support@clickreport.com.
You will receive a summary E-Mail every day, reporting the total traffic, unique visitors, and unique IP addresses for each landing page you are monitoring. This gives you an excellent snapshot of how your campaigns are working across multiple pay-per-click providers.
To get more details and search the results for a particular pay-per-click vendor, sign in to your ClickReport account and access more detailed and specific reports.
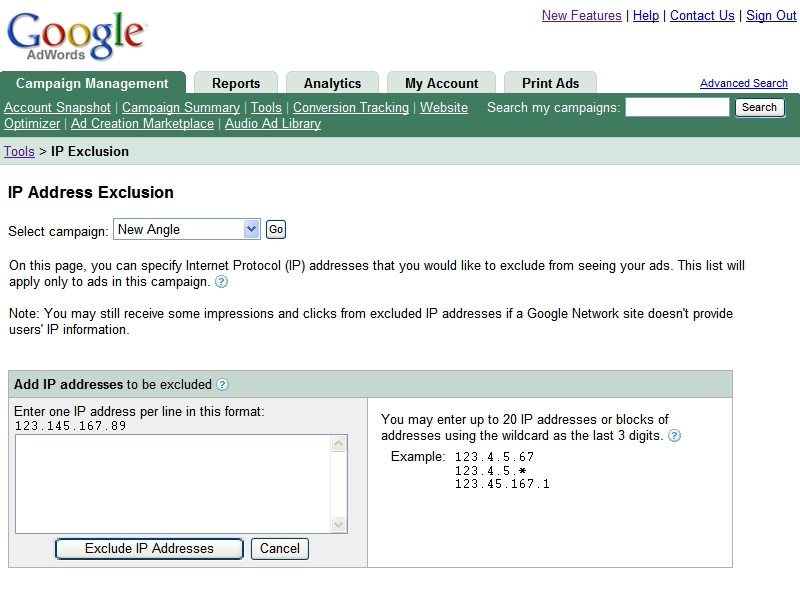
The report also includes repeat IP addresses, which potentially indicate PPC fraud that's going on. When you see that the same IP address is repeatedly clicking on your ads, you can go to Google and block the address so that the visitor doesn't see your PPC ads anymore. By logging in to your Google Ads account and blocking abusing IP addresses, you can prevent PPC fraud and potentially wasted advertising costs.
You can also log in to your account and generate custom reports with the ability to filter and export to PDF and XLS Formats.